Wednesday, October 27, 2010

Coring & Augering


Generally, my opinion of the Park Safari and its excavators is that we are all a rugged bunch. We dutifully and energetically attend to our trench as we did our first test pits.

But say we were not able to dig our systematic test pits and were unaware of the basic stratigraphy of the site- what then? There are a variety of other methods used to examine the innards of a site without actual excavation, saving both cost and time.

First and most simply are the techniques of augering and coring. These methods originated in the geology when it was used to understand the fluvial deposits in the Mississippian Delta region in 1935 (Stein 1986, 506). Once applied to archaeology in the same region, it was used to discern cultural from non-cultural deposits in an area of interest as well as compared to the geological findings to establish a relative chronology. Following the advent of radiocarbon dating, coring and augering became more of a resource for gathering testable material below the surface.

Augering is the more destructive of the two, requiring a drill of varying sizes bored into the ground and returning the soils from below. It can pull up in bucket sized increments the layers which it has disturbed, but they are by no means intact and sufficient for accurate study. To penetrate to large depths of several meters a motorized drill is often used to power the auger.

Alternatively coring involves small tubes- about 3cm in diameter- to be pushed into the ground at predetermined depth intervals and shaken forth to pull up a sliver, albeit a compacted one, of earth representing the stratigraphy of the ground below. It is officially defined by Stein as “a continuous section of sediment or rock obtained by using a hollow cylinder called a corer” (1986, 505). If to be used with radiocarbon or chemical testing, this sample preserves more accurately the layers below.

Similarly, soil testing is common practice in locating indications of human activity; phosphate testing is used to locate where the original chemistry of an area has been disturbed by either fire pits or concentrations of human activity, as when nutrients are removed from the soil by activity, or added in with refuse decomposition (Roskams, 55). At Park Safari we based the site of the trench (PS2010TR-1) on readings taken from the methane peepers set up by the McGill Geology department.

If we were completely unaware of the stratigraphy at the Park Safari graveyard, coring would act as an inexpensive and expedient method for understanding the layers we would encounter upon digging: these would be the organic layer, the mineral layer, and then the yellowish clay layer indicating artifact sterility. Were we to come upon a deposited layer, or animal remains, it would indicate a ‘cultural’ layer, which would then be plotted to a map for overall reference. Our overall picture of the graveyard, however, is severely lacking; there are no known burial sites except for those which have already been uncovered and in the middle of the western field stands what believed to be an old structure and our only indications are from the methane emission readings. A systematized augering test done at intervals through the mounds and vegetation would illuminate concentrations of articulated or non-articulated bones, therefore grave sites (like of lions).

In the last few decades a range of machines have been developed that create images of the sub-surface, blasting far beyond the WWII era aerial photography techniques of mapping. As they lay far beyond our budget, I include only a most special machine in this short post: Ground Penetrating Radar (GPR). The cause of a local stir both within and without the department of Anthropology, a newly acquired (or currently being acquired, depending on tense implications, and $$ allocations) GPR machine. In simple terms, GPR functions by sending microwave pulses (300-500MHz) below the surface, and creates an image based on velocity reduction of the wave once it has passed through a denser object (Kvamme 2005, 436-7). This method is highly depended on soil types and water content; our flooded trench, for example, would indicate we stand upon a rocky pond. On some days, indeed this is what I’ve come to believe too. But there is a lion in there somewhere.

Kvamme, K. 2005. Terrestrial Remote Sensing in Archaeology. In: Maschner, H.D.G., Chippindale, C. (Eds.), Handbook of Archaeological Methods. Lanham, MD: AltaMira Press, pp. 423-77.

Roskams, S. 2001. Excavation. Cambridge: Cambridge University Press.

Stein, J.K., 1986. Coring Archaeological Sites. American Antiquity 51, 505-527.
Wednesday, October 20, 2010

Lions and Curses and Nazis, oh my!

parc S stormabrewin
Can you see that storm a brewin'?


Archaeologists deal with some pretty dramatic circumstances. According to a History Channel documentary I happen to own, we are constantly in danger of noxious gases, earthquakes, attacks by local landowners, curses and Nazi’s. I couldn’t make this stuff up if I tried. These may be legitimate worries though, since I too feel like I’ve finally earned my archaeologist’s fedora. For the last few weeks, we at Parc Safari have had to deal with the worst of the worst. We have had (gasp) inclement weather.


All joking aside, the weather has actually been pretty poor in Montreal of late. And apart from making my teeth chatter and my llama-wool socks wet, the rain has been a bit of a problem on site. In fact, only last week group B was forced to come home in the middle of a field day, despite Chris and Colin’s promises that we (like the US Postal Service) would not be deterred by rain nor snow nor sleet.


It is an unfortunate fact that excavation relies heavily on our ability as field workers to actually see the unit. When the weather is poor, the rain poses some problems. What my fellow students and I recently realized is that rain makes the soil deposits wet (an incredible revelation, I know). This made using a flow diagram, such as the one we were given (to determine the composition of deposits) more difficult. It was harder to differentiate between layers by colour for instance. What I mistook for a change in stratigraphy turned out to be what Colin called a “tub ring”. The rising water table and rainwater left a ring of discolouration on the walls of the unit after we finished bailing.


On the other hand, the rain would have been fortuitous if we had we been using a Munsell chart to determine colour. This is because the rain would have "moistening it until it no longer darkened" which is the proper technique for Munsell. Unfortunately our Munsell chart chips are not waterproof making them useless in the rain. In better conditions a field worker is expected to record not only the colour and soil type (which we tried to do) but also the inclusion size and surface details of each stratigraphic layer (Roskams 2010). We did not make note of the inclusion size but we did, as I will discuss later, map in ‘surface details’.


On a side note: an interesting fact I learned through the readings is the difference between soil and deposit. Soil is created in situ, if you will, by organic means whereas a deposit is brought into it's current location via natural forces like flooding and erosion or by human means (Roskams 2010), such is the case for Parc Safaric where backhoes and large machinery were likely used. But I digress...


Wet weather, along with a high water table also made it difficult to excavate. Not only were the sides of the unit highly unstable but seeing the bottom of the unit was near impossible for group B. According to Colin they could not bail fast enough to keep a dry bottom. I think underwater salvage archaeology is incredibly interesting, but that’s not what we are supposed to be doing here at Parc Safari!


Thankfully, all was not lost. We were not going to throw in the metaphorical trowel. We were better than that as archaeologists, gosh darn it! Given that group B could not actually excavate, they retreated honorably into drier conditions for a lab-style lesson. We in group A managed to practice a few skills that didn’t involve digging too much deeper. Since we uncovered a few more bones (including what is part of an axis) and rocks it was decided that drawing the unit was the next step. Interestingly, we also uncovered a large embedded piece of heavy-duty metal cord.


Chris and Colin led us in a quick lesson on how to draw and map a unit. I have had plenty of practice on mapping, from my field school this summer but only in the base-line drawing method. Chris and Colin proposed three alternative ways to map a site or unit.


  1. Hip chains

This method involves using a forestry tool called a hip chain. It is a biodegradable rope material that is released from a canister hung off of a person’s hip. Like a pedometer, hip chains measure distance, though in metric terms instead of steps to help an archaeologist map a large unit or entire site.

  1. Triangulation

This method is used to determine the location of a point by measuring angles to it, from known points at either end of a fixed baseline, rather than measuring distances to the point directly. To use this method you anchor your two tapes at known points (in our case the corners of a unit). Then you level them with line levels and you measure the distance of each to the object. You record this. Then you scale the measured distances with a compass and draw circle segments; the point where your segments intersect is where your new previously unknown point is. Plot this on lattice graph paper.

  1. Drawing screen

This method is very useful for smaller units or those that have a large quantity of material to draw. It involves putting a physical screen over the unit, which corresponds to a metric grid system and plotting the results on lattice graph paper.


The method we used on Friday was the base-line method of drawing. A ‘base line’ is set up along one axis of the unit, using a tape measure along the string. A second tape measure is used to ‘eye-ball’ a point (on a bone, interesting feature etc) that you want to draw, and the distance from the baseline is used. Often a plumb-bob is used for deeper units to help with the estimating. The coordinates are then called out to someone who has a scaled map set up on lattice graph paper and the points are plotted.


Photobucket
He's down there somewhere...


Weather is something we as archaeologists have no control over. We can pray to the (undead) spirit of Lewis Binford all we want but sometimes the day just turns out soggy. We are a resilient type of academic, willing to brave the elements, but we are also bright enough to know when to pack it in. No, we have not found lion yet. I want to believe he’s there though, waiting in our watery unit, biding his time.


Wednesday, October 13, 2010

RESPECTING THE RULES

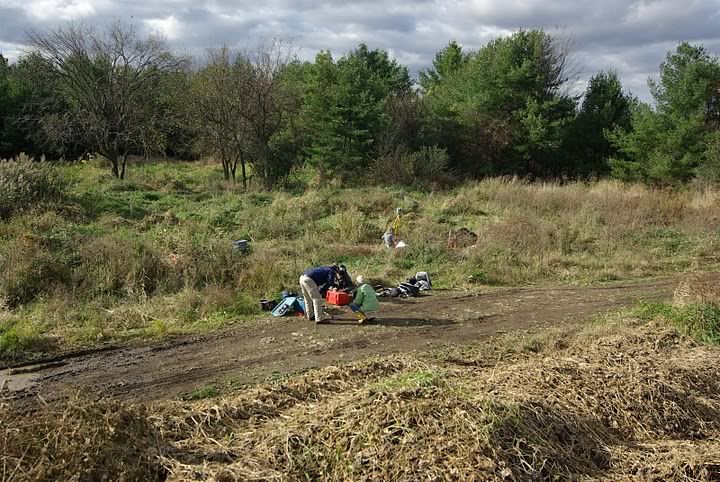
 After digging a number  of inconclusive tests pits over the past two weeks, we were running out of time ( the deep cold of Quebec slowly approaching).  So, Chris and Colin had to intervene in order for the project to get back on track! To help us find something, they asked the biologists (who are conducting a study of the methane level contained in the soil at the site) if they had any insight . They told them that based on a number of sample spots scattered around the (West side of the road) two of them (#3 & #5)  showed interesting results. Both had a very high level of methane which increased as investigation went  deeper contrary to the other sample which sustained  a constant reading throughout the probe.  Biologist suggested that it could be an indication for the presence of bones. This meant that we now had a new potential location to explore !

So the goal of the day was to dig a trench!  & Hopefully find some BONES

We decided to dig a 2m x 50cm trench (PS2010 TR1) in order to  get a more extensive knowledge of the underground.The down side, of this method is that if by any chance we were to hit  something  we would probably not get a full individual due to the narrowness of the unit. In this case, we would dig a larger trench.

But before we could start digging we had to: clear the vegetation in order to set up the unit and have enough space to dig.

Once this was done we were finally ready to DIG !!!

 But we had to keep in mine the   Golden rules of excavation:

1) DO NOT dig, EXPOSE!                                        This means that we MUST NOT pull anything out of the unit, roots, rock, artifacts but rather expose them (scrape around) and the remove them. When exposing, scrape away from the walls and remove the dirt as we go. (Roskams, 2001, 228)

2) Keep the unit leveled at all times.

3) Keep the unit wall straight and vertical


Roskams argues for  the screening of the soil in order  to uncover small artifact(Roskams, 200, 222).But since we do not have a lot of time and we are especially looking for large bones we will not be using this method when excavating, instead  we will make a pile of  unscreened soil in order to back fil the unit at the end of the season.

After digging for about 20 minutes we made our first find: a feline claw. It was a good start, at least compare to the previous weeks we were finding  something!  A large concentration of toe bones were also uncovered the majority of them coming from the West end of the unit.      We started questioning the fact that we would find only toe bones in the loose surface. Why is that so ? (the only speculation that we were able to make was that the big Cat was buried on his back : ) )

Care was taken to keep the walls of our unit straight at all time but  it was more difficult than imagined since it had rain for the past week making the ground very soft and our walls unstable.

About 10 centimeter below the surface we started witnessing some type of silvery material at the centre of the unit, so we started scrapping around in order to uncovered it ( The # 1 rule when excavating is to expose and not to pull out anything until it is not totally uncovered) So since we are professionals this is what we did and finally after completely exposing it, we were  excited to discover that it   was a pull tab  Budweiser beer  can probably dating from the 1970s-or 1980s. In his article Glassow discusses the excavation of such “site’s depositional history”, the organic or inorganic remains left at the site by  past occupant, and the fact that they can enable us to date the site (Glassow,2005, 158-159).

After uncovering this artifact we realized that our unit was not leveled anymore. (The rule #3 in excavating, archeologist need to keep there unit leveled at all times) It was lower on the West side than not the East side. Even though this task seems simple it becomes very challenging when 6 persons are digging in such a small trench!  So we started to dig deeper in the East side of the unit and we made the find of the Day!

In the South-east corner of the trench we found part of an articulated leg of a large animal.  Even though, we got really excited and wanted to take the bones out in order to i.d. them we had to restrain ourselves and respect the Number 1 rule: Exposing.  While Karen and I were exposing the bones, the other girls  went to setup up the total station in order to map them. Once mapped, we were able to remove some of the bones but two large ones were stuck in the south and east wall of the unit. The last find of the day was a small scapula near the south wall  in the centre of the unit.

This was conclusive day since we finally found some bones! But we have to keep in mind that archeology is science and that while excavating the Golden Rules need to be respected at all times.


Work sited:

Glassow, M.A. 2005. Excavation. In: Maschner, H.D.G., Chippindale, C. (Eds.), Handbook of Archeological Methods. Lanham, MD: AltaMira Press, pp.133-75.

Roskams, S. 2001. Excavation. Cambridge: Cambrifge University Press.

Tuesday, October 5, 2010

“If only it were like Indiana Jones!” or Meditation on the fact that archaeology is inevitably slow but worth it in the end


(EDIT I was just recently informed that Group B uncovered some exciting remains this past Friday, October 1. So please keep in mind that when I had written my entry we hadn’t found anything yet! merci)

Every aspiring archaeologist almost certainly must confront the unfortunate truth that the archaeological process is rarely as it is portrayed in film and adventure shows. We all hope to discover that coveted research find, whether it be a pharaoh’s tomb, a mythical lost city, or a seemingly trivial ceramic fragment. For us budding excavators at Parc Safari, our search this past week continued for the supposedly bountiful animal bones. When I had first heard about the abundance of animal remains at the site, I had a series of fanciful imaginings of us excavators practically tripping over gargantuan ribs and femurs jutting from the ground. However, after we had begun excavating, the site became more and more in my mind simply the abandoned overgrown field it ostensibly is, void of any noteworthy archaeological remains. Of course this is not the case, but my dubiousness illustrates that the archaeological method is a slow, often painstaking process, one in which your desired finds will rarely present themselves conveniently within the first few days of excavation.

Last Friday, September 24th at Parc Safari consisted of digging more test pits in order to determine the location of our future excavation unit. As Glassow maintains, test pits are integral to the archaeological process, as they provide the archaeologist with a basic understanding of stratigraphy, as well as an opportunity to come across some material remains like bone or artefacts (Glassow 144). Such finds of late in our test pits included, as Dominique mentioned, the Parc Safari “garbage,” providing evidence that dead animals were not the only materials deposited at the site. A more promising find, one that is directly related to our research focus of finding animal remains, is the retrieval of red rope, which according to Parc Safari staff was used to bind the dead animals prior to their burial at the site.

Upon reaching bedrock, we evened out the sides of the test pit, and proceeded to map out the distinct layers of soil, as well as including any features such as rocks, garbage, or the prized “red rope.” Drawing profiles is more an art than a science – final drawings of test pit profiles necessarily seem to be simplifications, as the layers of soil will rarely be as clearly defined as they are rendered in drawn form. That being said, this perceived lack of difference is inevitable given my considerable lack of expertise concerning soil types; profile mapping requires a level familiarity, achieved only through experience, through which we become more perceptive of such subtle differences. To the unfamiliar eye, things tend to look the same.

Archaeology demands the dedication of the excavator. Our experiences at Parc Safari have further highlighted the fact that, even though we know there are animal bones on the site, the locating of such remains is far from a straightforward task. Although the going is slow, archaeology is rarely unrewarding in the end. I remember for the first time uncovering a cache of ceramic fragments at the top of a Mayan structure in Belize this past summer, and suddenly every source of pain, bother, and frustration was rendered entirely insignificant: the deathly mosquitoes, the suffocating humidity, the trowel and shovel blisters. Fortunately, as humans, we are able to selectively remember and conveniently forget. This capability for me transformed a largely arduous ordeal (upon reflection) into a rewarding, enriching experience. As evidenced by our progress at Parc Safari so far this semester, archaeology is slow and labour-intensive. But it is in the end, I think, well worth it.

Works Cited:

Glassow, M.A. 2005. Excavation. In: Handbook of Archaeological Methods. Eds Maschner H.D.G., Chippindale, C. Lanham, MD: AltaMira Press.